
Appointments
Add a useful scheduling note #
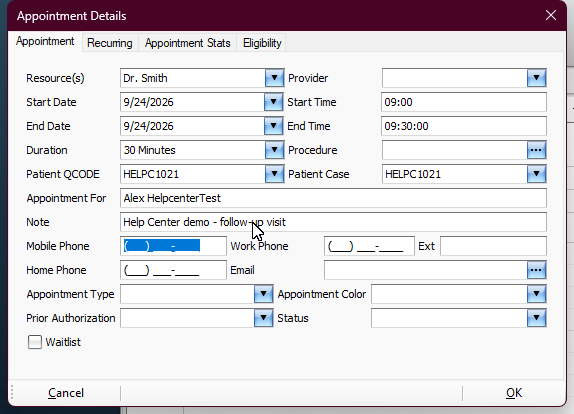
The Note field in Appointment Details can store a short scheduling message for the appointment. In the demonstrated workflow, that note is visible with the calendar appointment, so use wording appropriate for staff who work from the schedule.
Keyboard shortcuts: Press Ctrl+S to open the Scheduler. In a form, press F2 to save and Esc to close.
- Open the appointment in Appointment Details.
- Click in Note.
- Enter or update the scheduling message.
- Press Tab or click another field, then review the rest of the appointment before saving.
Keep the note focused on scheduling and office workflow. Follow your organization’s privacy practices when deciding what belongs on a shared schedule.
Appointments
Save and verify the note #
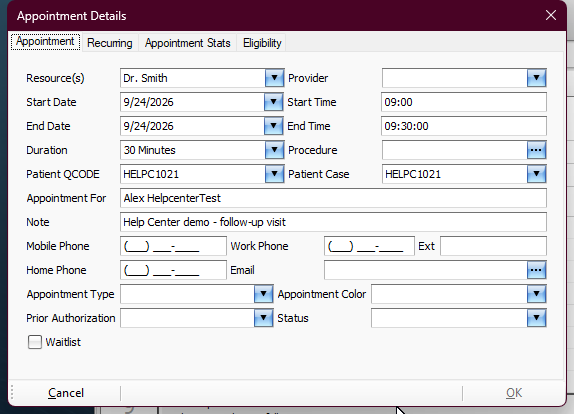
- Check that the patient, date, time, and resource still describe the intended appointment.
- Click OK.
- Return to the calendar and review the appointment.
- Double-click the appointment if you want to confirm the exact saved note in Appointment Details.
If you changed only the note, make sure the original date and time remained unchanged.
Changing or removing a note #
Open the existing appointment, edit the Note field, and save with OK. Reopen the appointment if needed to verify the result. If you only opened the appointment to read its note and made no changes, use Cancel to return to the schedule.