Appointments
Select the correct patient before scheduling #
An appointment should be connected to the correct patient record and the appropriate patient case. Checking both before saving helps prevent scheduling and billing confusion later.
Keyboard shortcuts: Press Ctrl+S to open the Scheduler. In a form, press F2 to save and Esc to close. In a lookup field, press F3 for Lookup, Insert for Quick Add, or Ctrl+E for Quick Edit.
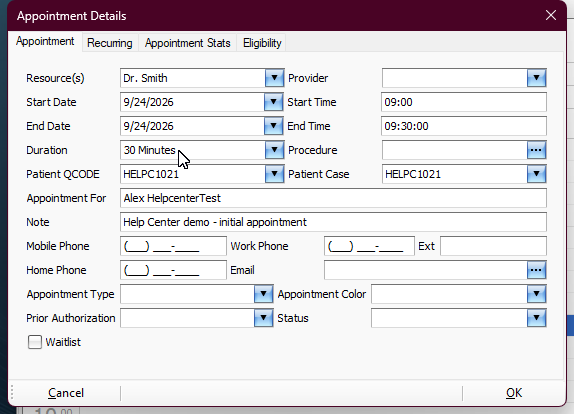
- Open Appointment Details.
- Open the drop-down beside Patient QCODE and choose Find.
- Locate the existing patient and select the correct result.
- Review the patient information that returns to the appointment before continuing.
Search carefully before creating another patient record. Duplicate patient records can make later scheduling and billing work harder to follow.
Appointments
Check Patient Case #
A patient can have more than one case for different insurance or billing situations. Patient Case is therefore separate from the patient’s identity.
- After selecting the patient, review Patient Case.
- Confirm that the displayed case belongs with the visit you are scheduling.
- If the patient has multiple possible cases and you are unsure which one applies, follow your office’s registration or billing procedure before saving the appointment.
Do not use the patient name alone as proof that the correct billing context is selected.
Appointments
Confirm the saved appointment #
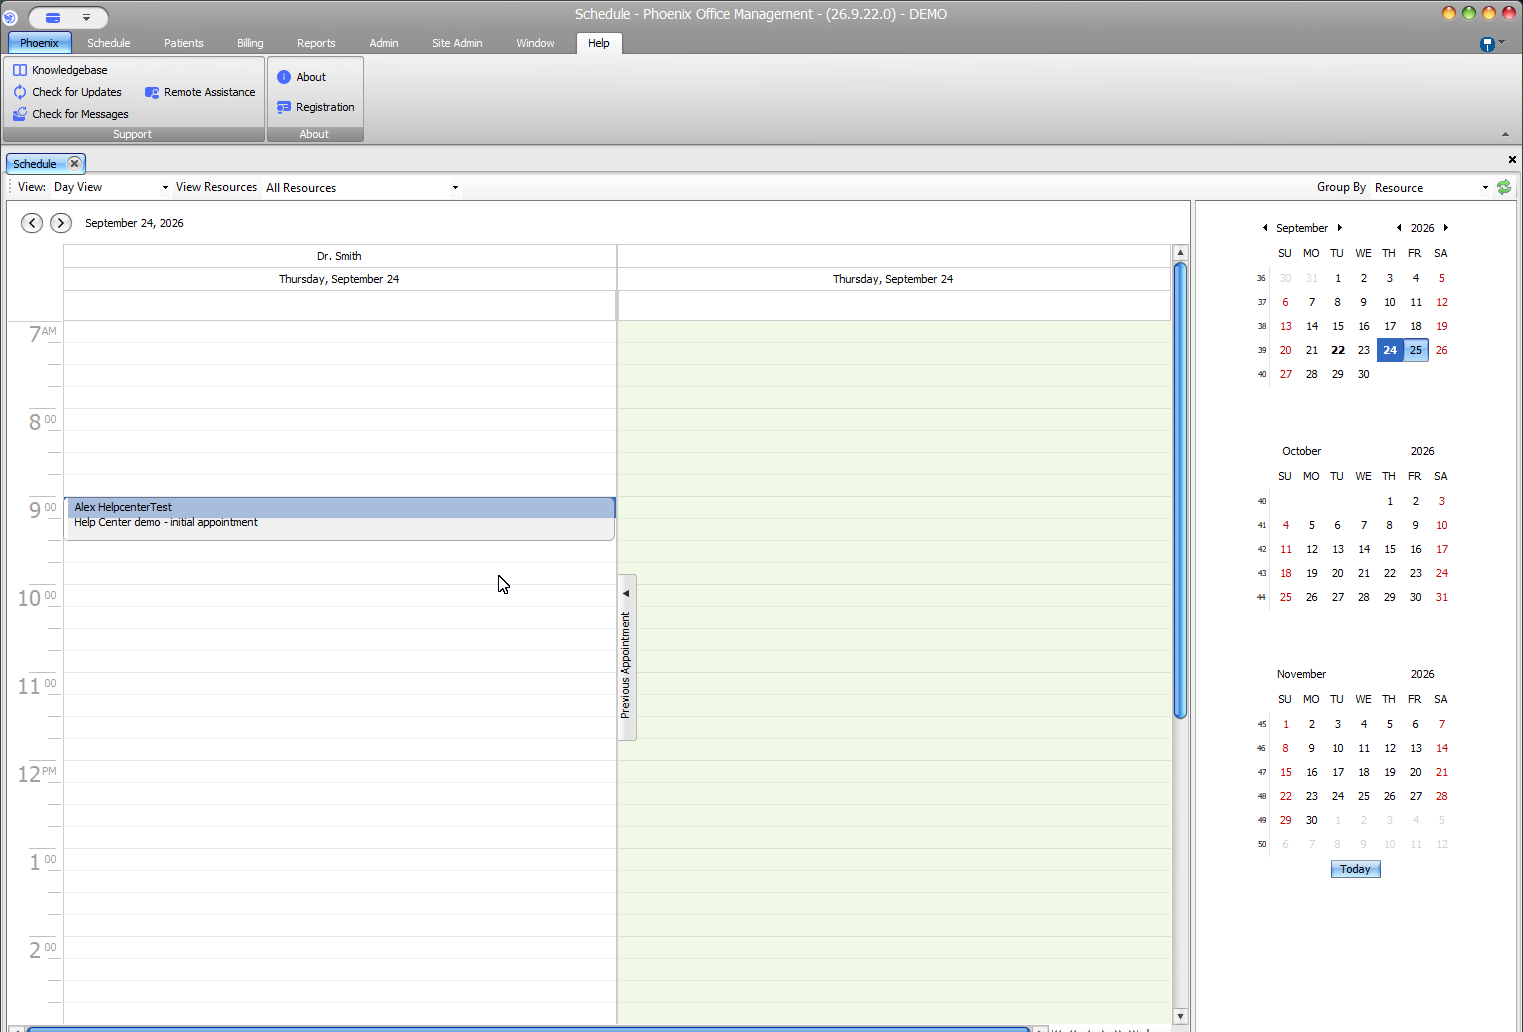
After the patient and case are correct, finish the appointment details and click OK. Find the appointment on the calendar and confirm that the expected patient appears in the intended time slot.
If the appointment is missing, first check the selected date and the resources currently displayed. Look for the saved appointment before creating another one.