
Scheduling · Appointment information
Appointment Types #
Use Appointment Types to define the labels, default duration, and color staff see when choosing an appointment type.
Keyboard shortcuts: In a form, press F2 to save and Esc to close.
Open Appointment Types #
- Select the Schedule tab on the Phoenix ribbon.
- In Appointment Codes, select Appointment Types.
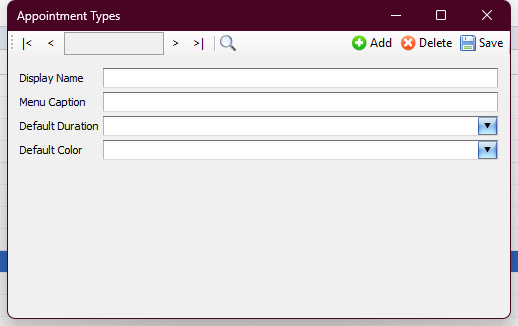
- The Appointment Types window opens over the Phoenix workspace.
What each field controls #
- Display Name identifies the type.
- Menu Caption is the caption associated with the type.
- Default Duration supplies its initial duration.
- Default Color supplies its schedule color.
Add an appointment type #
- Select Add.
- Enter the Display Name and Menu Caption.
- Choose the Default Duration and Default Color.
- Review the values, then select Save.
Use names and durations approved by your practice. Similar or duplicate names can make appointment selection harder for staff.
Update an appointment type #
- Use the record controls or lookup to locate the type.
- Confirm that you selected the intended record.
- Change only the needed value.
- Select Save.
Before deleting a type
Phoenix includes a Delete control, but its effect on existing and historical appointments has not been verified. Have an authorized administrator review the type’s use and retention requirements before deleting it.