
Administration · System management
Administrative Settings #
Phoenix separates visible administrative settings by practice, user, and site scope.
Keyboard shortcuts: In a form, press F2 to save and Esc to close.
Practice Preferences #
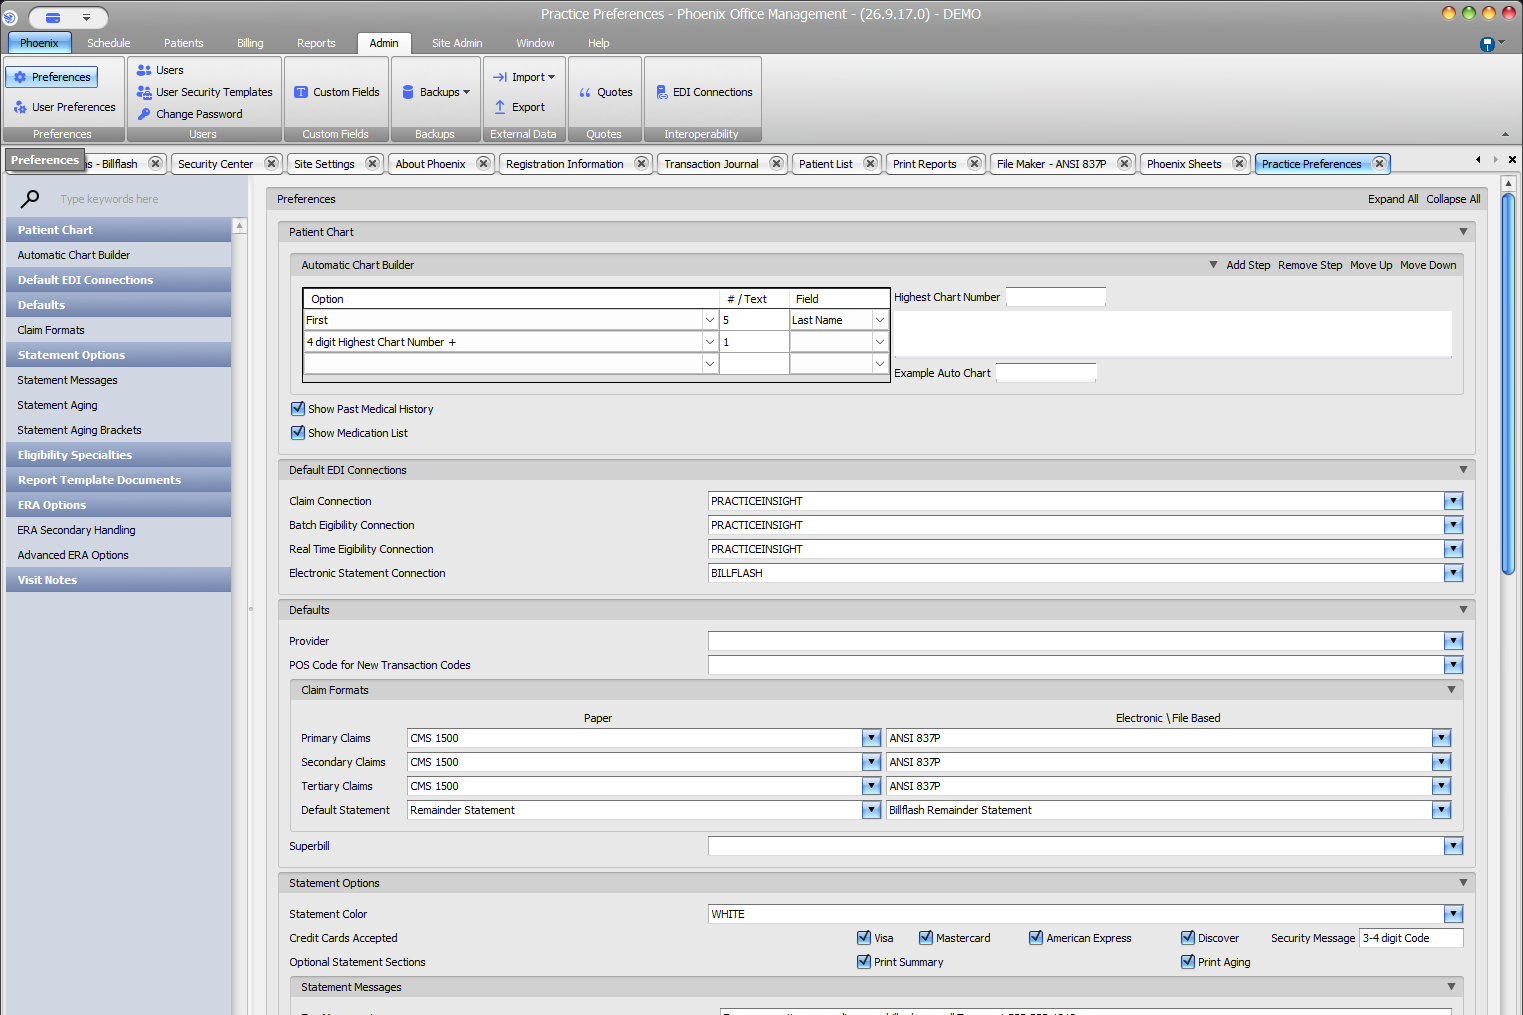
- Open Admin > Preferences.
- Use the left navigation for patient chart, EDI defaults, claim formats, statements, eligibility, ERA options, and visit notes.
- Use Expand All or Collapse All to review grouped settings.
User Preferences #
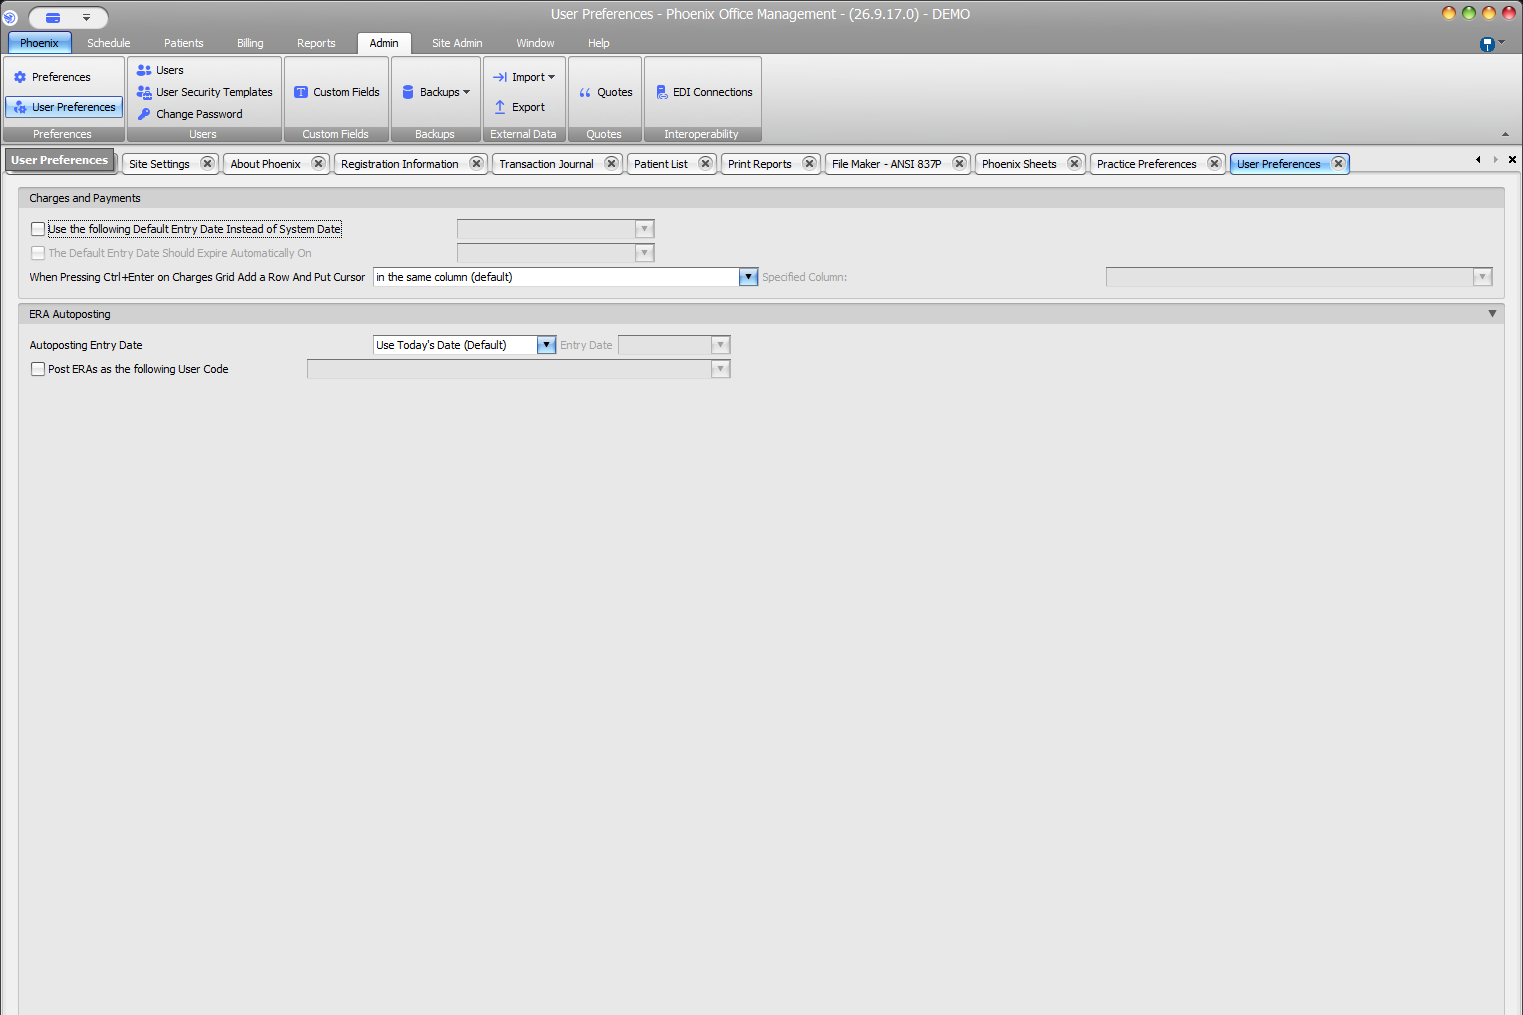
Open Admin > User Preferences for options displayed under Charges and Payments and ERA Autoposting, including default entry dates, Ctrl+Enter row behavior, autoposting entry date, and user code.
Site Settings #
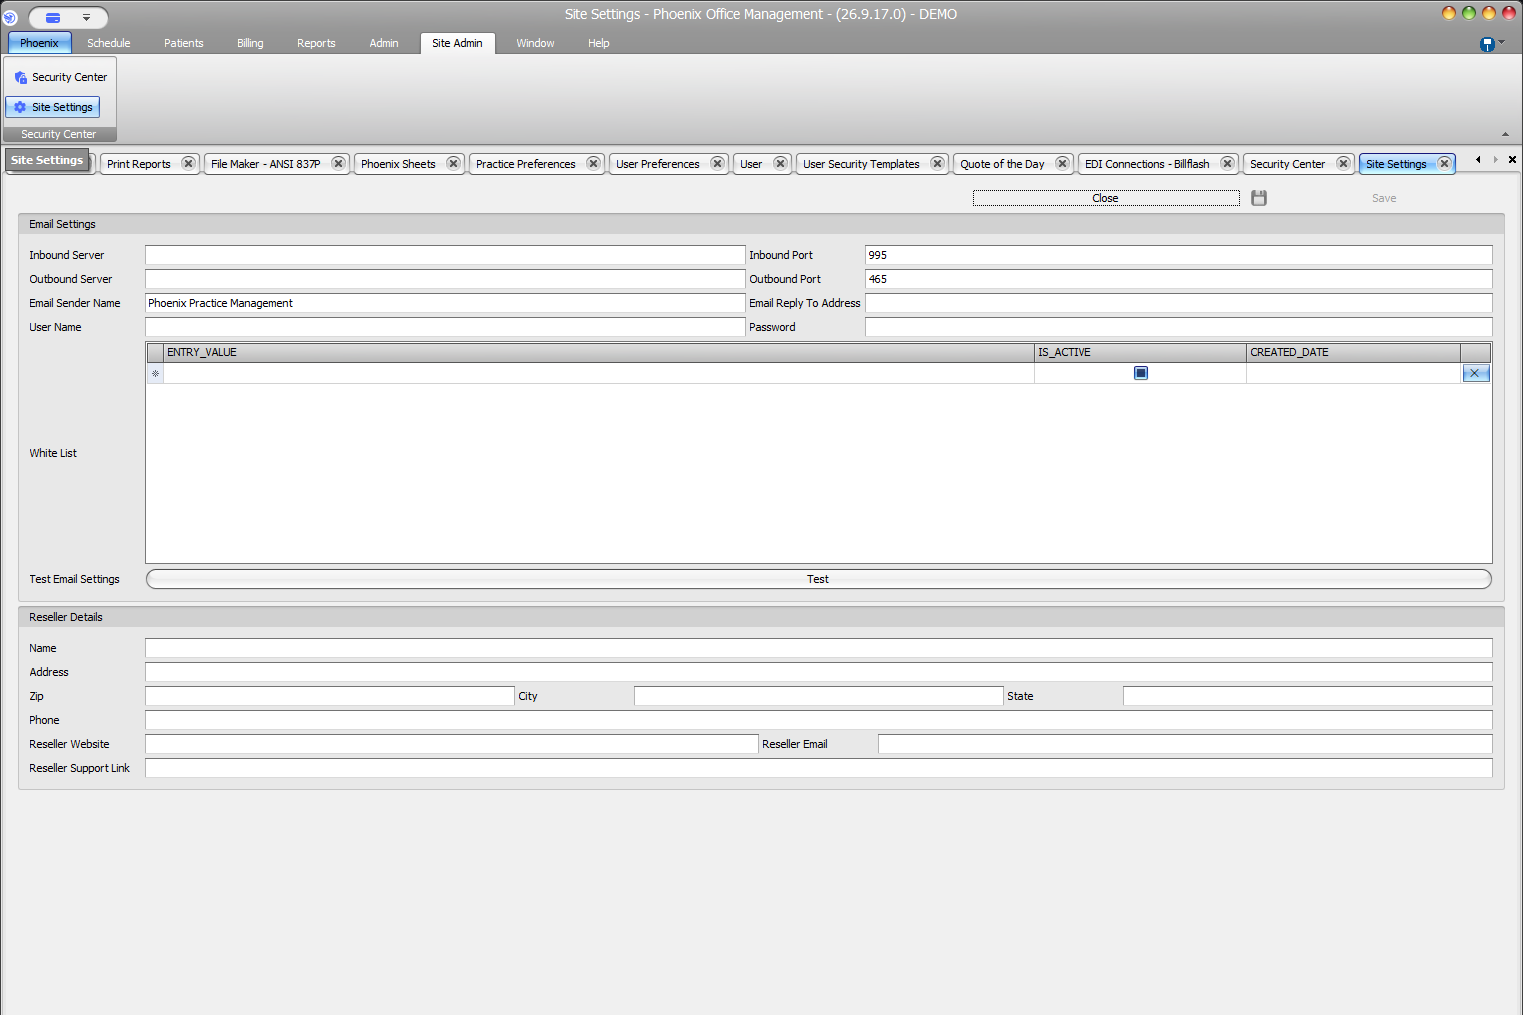
- Open Site Admin > Site Settings.
- Review Email Settings, White List, Test Email Settings, and Reseller Details.
- Confirm the setting category before making a change.
Choose the correct scope
The captures confirm labels and grouping but not permission requirements, validation, save timing, or operational effects. Do not test email, alter connection values, or expose credentials without explicit authorization.